ROS 2 Tutorial for Beginners (Part 3): Understanding ROS 2 Nodes (Sub Part 1)
What nodes really are, how multiple nodes run together, and how to inspect them using ROS 2 tools.
Satyarth Shree — Jan 04, 2026
About This Article
This tutorial has been written for beginners who wish to practically understand what a ROS 2 node is and how does it works.
If you are someone who wants to see nodes in action and how they work with each other then you have came to the right place.
I will not talk about any bookish definitions. I will show you how a node works and how you can analyze a node while it is working.
I also recommend you to do what I am doing step by step. Open this blog and your terminal simultaneously and follow what I am going to show you to extract maximum value from this tutorial.
This tutorial is a hands on practical guide so I will show you the working of a node and how it interacts with other nodes practically.
If you haven't installed ROS then read part 1 of this tutorial series first.
ROS 2 Tutorial for Beginners (Part 1)
This is the third part of our ROS 2 Tutorial for Beginners Series and a continuation of the second part. If you are interested then you can read part 2 also.
ROS 2 Tutorial for Beginners (Part 2)
So let's get started
Section 1: Set Your System for a Smoother Workflow
In later sections of this blog when we will run multiple nodes together you will have to open multiple terminals together.
While you can open multiple terminals using the terminal which is pre installed on your Linux system but I recommend using another command line interface known as terminator. In terminator you can split your terminal into multiple terminals without even touching your mouse therefore increasing speed and easiness to navigate and use command line.
To install terminator follow the steps given below:
- Connect your system to an active internet connection
- Open your terminal
- Type the following command:
sudo apt install terminator
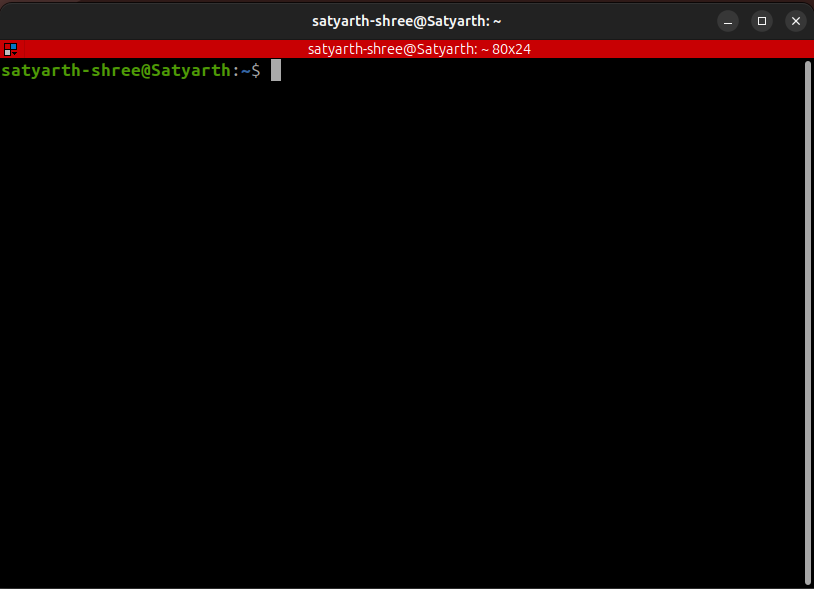
After you type this command installation of terminator will start. It is a very lightweight command line interface so it won't take much of your memory and will be installed quickly. Once installation is finished go to your apps section and open terminator. You will see the following interface:
Now click on CLI (Command Line Interface) and press Ctrl + Shift + E and you will see that your terminator has been vertically split into two parts as shown in figure below:
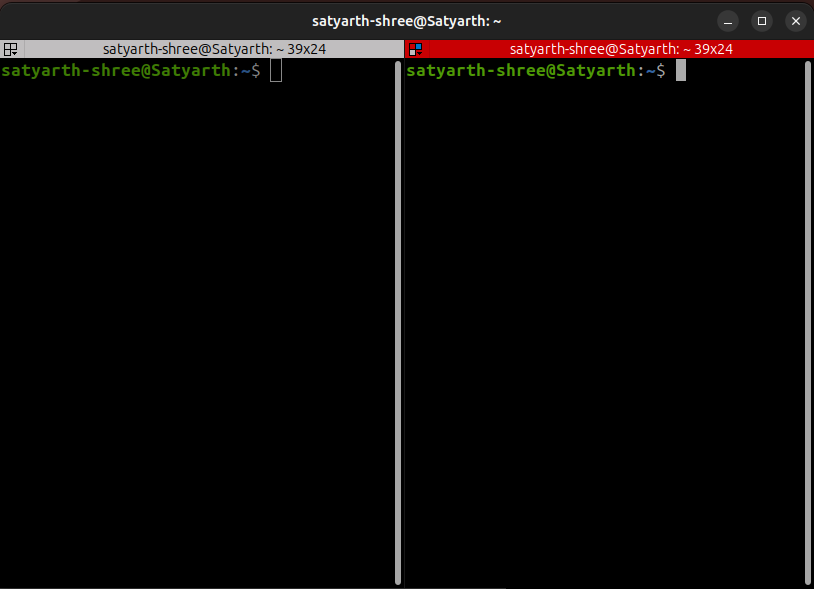
By Ctrl + Shift + E, I meant to say that press Ctrl, Shift and E simultaneously on your keyboard. Now click on any one of these parts and press Ctrl + Shift + O and you will see that the part which you have clicked will further split into two horizontal parts as shown in figure below:
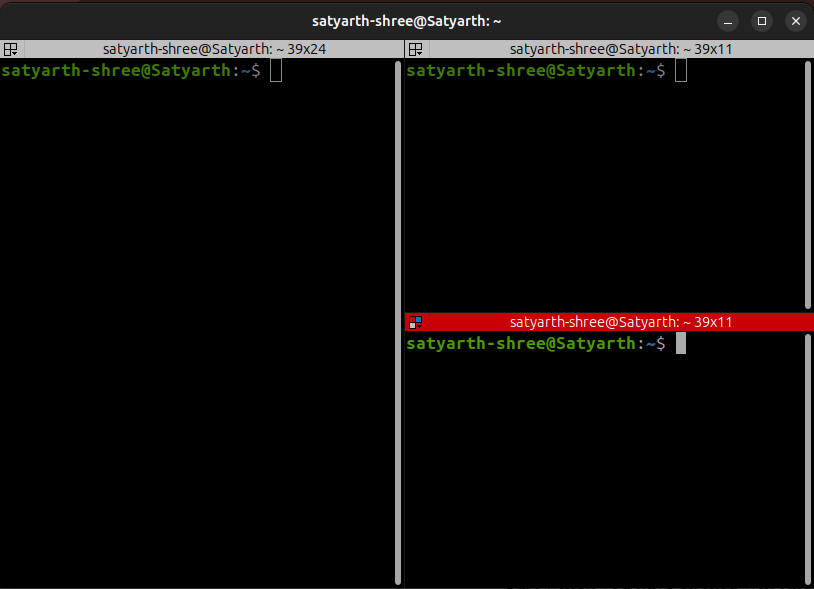
Now do the same with the part that is left.
- Click on it once to select that part
- Press Ctrl + Shift + O
And you will see that now you have four different command line windows in which you can type and run commands as shown in the figure below:
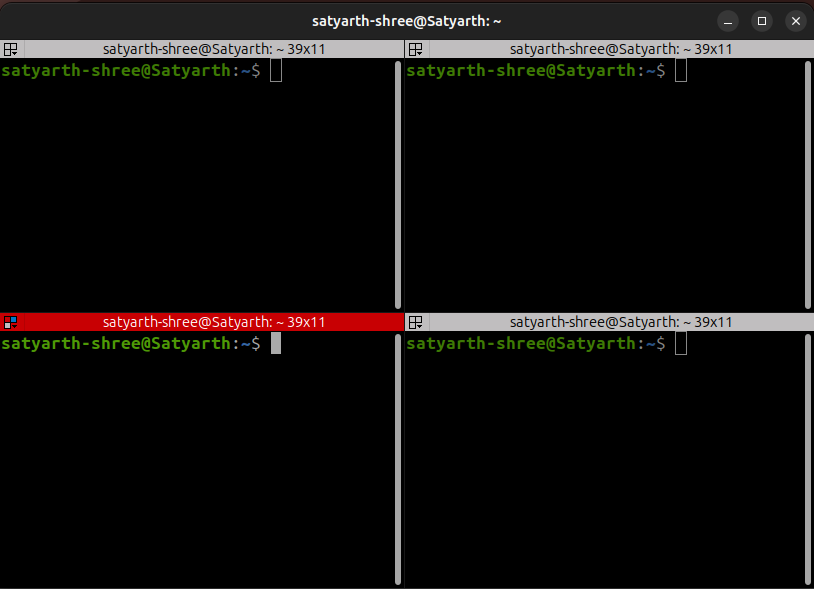
Now click on any one of these 4 parts to select that part and then press Ctrl + Shift + W. You will notice that doing this will destroy that part and your terminal will now look somewhat like this:
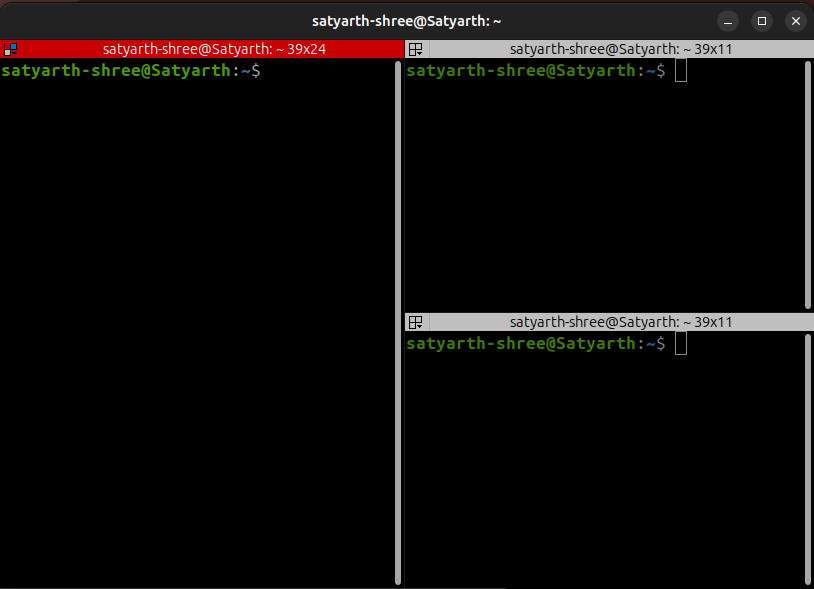
Now again click on one part and press Ctrl + Shift + W. Another part will be destroyed and your terminator will look somewhat like this:
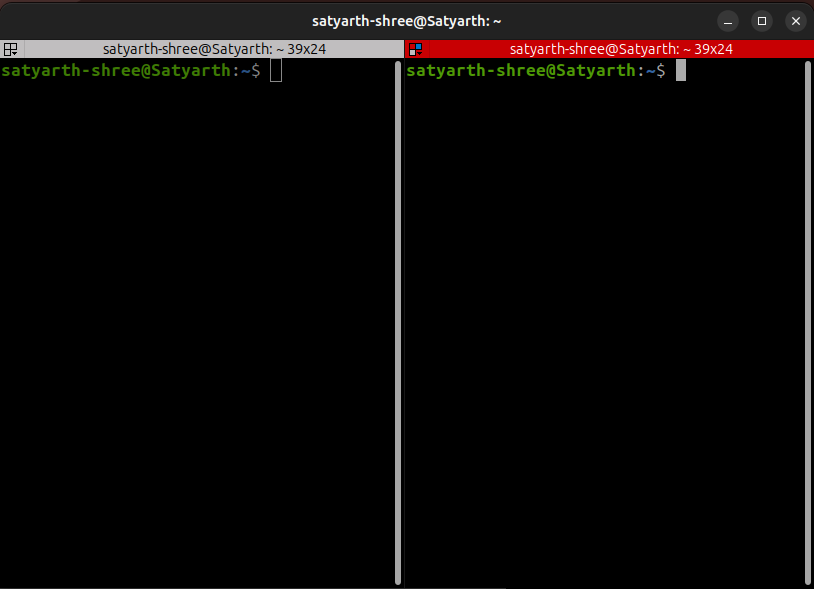
When you open a terminator you will see a single command line interface (CLI). These commands can allow you to create multiple CLI and then destroy them if you don't need them.
To summarize:
- Click a CLI to select it and then press
- Ctrl + Shift + E to split vertically
- Ctrl + Shift + O to split horizontally
- Ctrl + Shift + W to destroy that selected CLI window
- Each part after splitting can be called a window of the Command Line Interface (CLI) which is our terminator.
Although installing terminator is not mandatory but it will help you increase your efficiency once you get a knack of it so I recommend using it.
Section 2: Running a Node
Now let's run a node. Before running a node you should know how you can run a node. To run a node you have to run a command having the following syntax:
ros2 run <package_name> <name_of_executable>
A node is always created inside a package so to run a node you have to write the name of the package inside which your node exists. After you have created your node you have to create an executable to run that node. So after writing package name you have to write the name of your executable. Do not write greater than (>) or less than (<) signs when trying to run a node. These are just used while writing syntax.
The name of your executable and the name of your node may or may not be same so don't get confused.
To simplify you can say there are two types of nodes in ROS 2. They are:
- Built-In Nodes: These are nodes which are already installed when you install ROS 2. So they can be considered as built-in or pre installed nodes.
- Custom Nodes: These are the nodes that you create yourself.
There is a small change in the procedure to run Built-In and Custom Nodes which we will discover in subsequent sections of this blog.
First we will discuss how to run a built-in node by running a few of them.
Running a Built-In Node
The first step before running a ROS 2 command is to source ROS 2. To source ROS 2 type the following command:
source /opt/ros/<distro>/setup.bash
Replace <distro> by your ROS 2 distribution. If you are using humble then you should execute the following command:
source /opt/ros/humble/setup.bash
If you are using Jazzy then you should write:
source /opt/ros/jazzy/setup.bash
Simply replace <distro> by your ROS 2 distribution as shown above.
We are going to run a built-in node which publishes messages. To do so after sourcing your ROS 2 environment split your terminator CLI into four windows (as already discussed above) and run the following command in one of those windows:
ros2 run demo_nodes_cpp talker
You will start seeing a series of "Hello World" messages getting displayed as shown in the figure below:
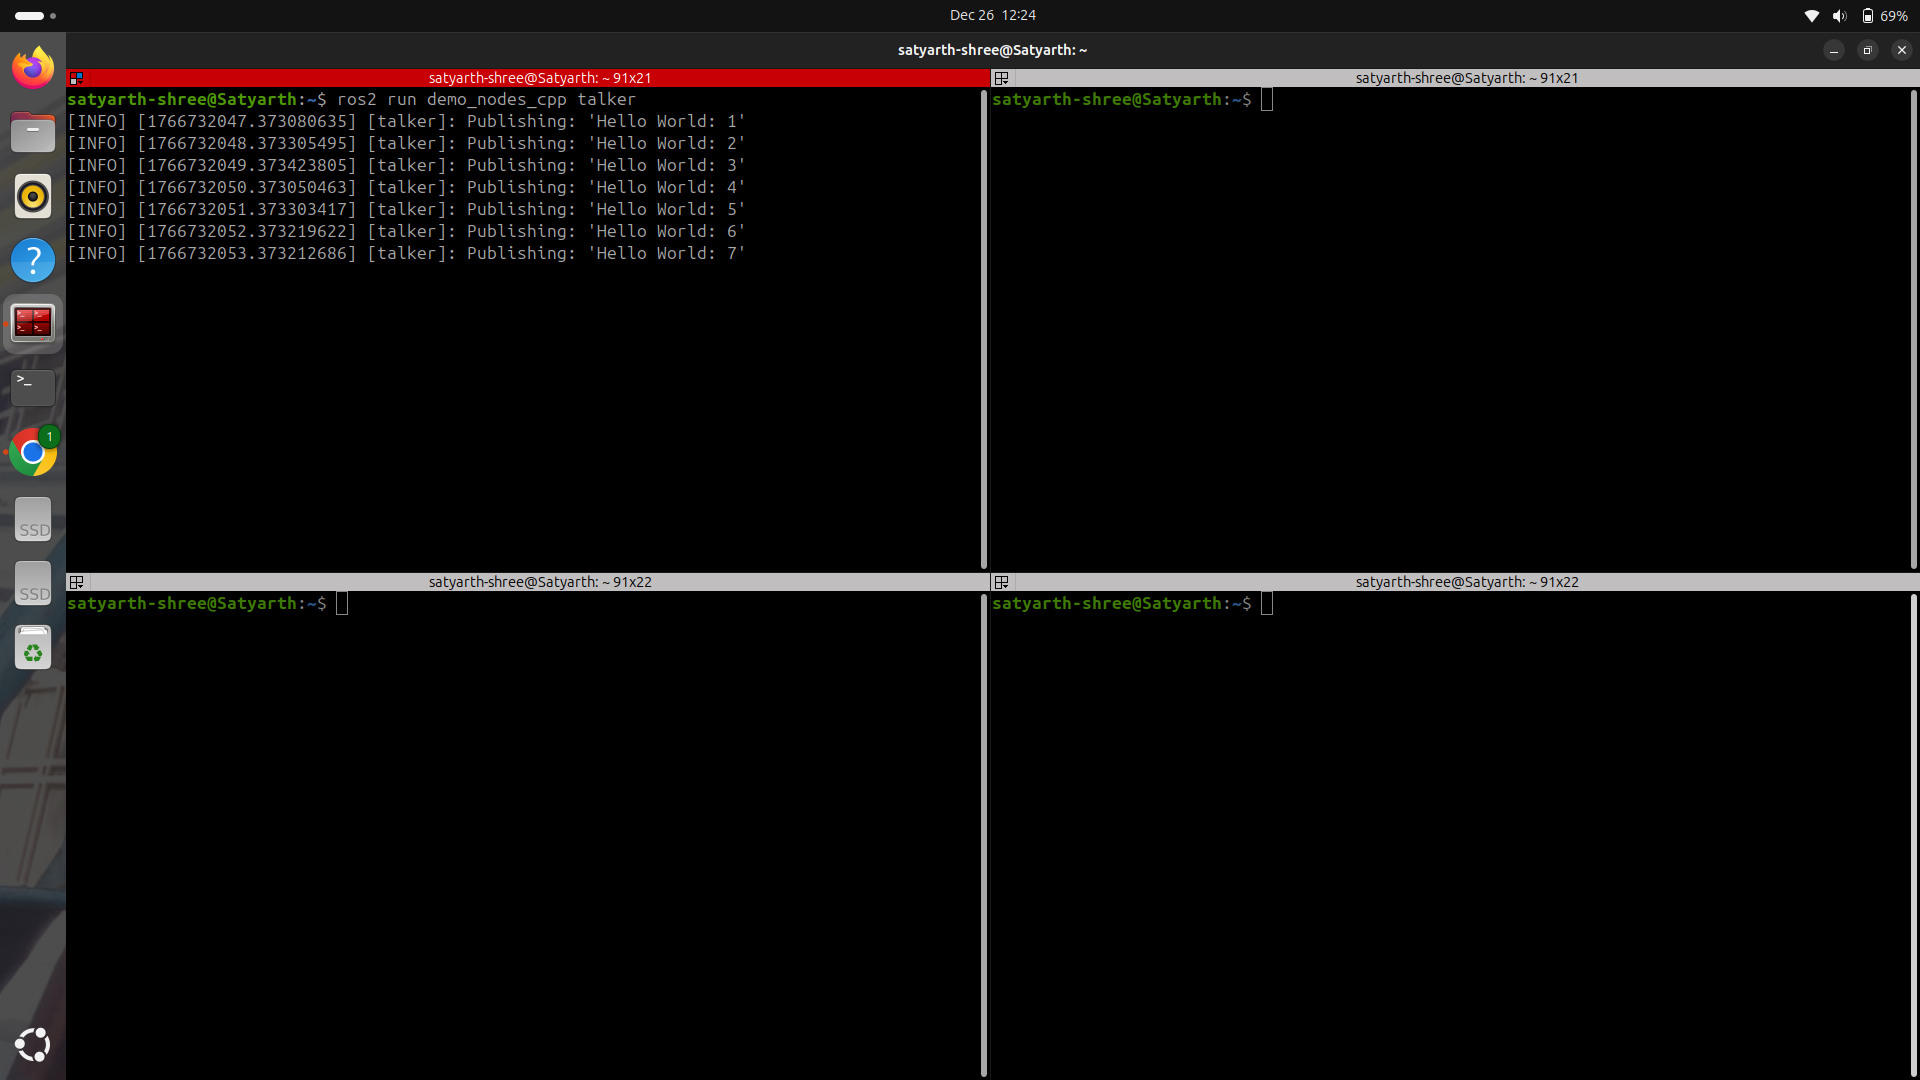
These messages will keep on displaying again and again until you terminate this node. Now take a closer look at the command which you used to start this node. It is:
ros2 run demo_nodes_cpp talker
As I earlier told you that after ros2 run we write the name of the package inside which our node exists and then the name of our executable. So in this case the name of our package is demo_nodes_cpp and the name of our executable is talker.
Alright so now one of our nodes is already running on our system. But how can we check which node is running. There are essentially two methods to do so.
Method 1: Using ros2 node list command
While your node is running click on another CLI window (one of parts that you have generated after splitting your terminator) and type the following command:
ros2 node list
Then you will see the name of the node which is currently running as show in the figure given below:
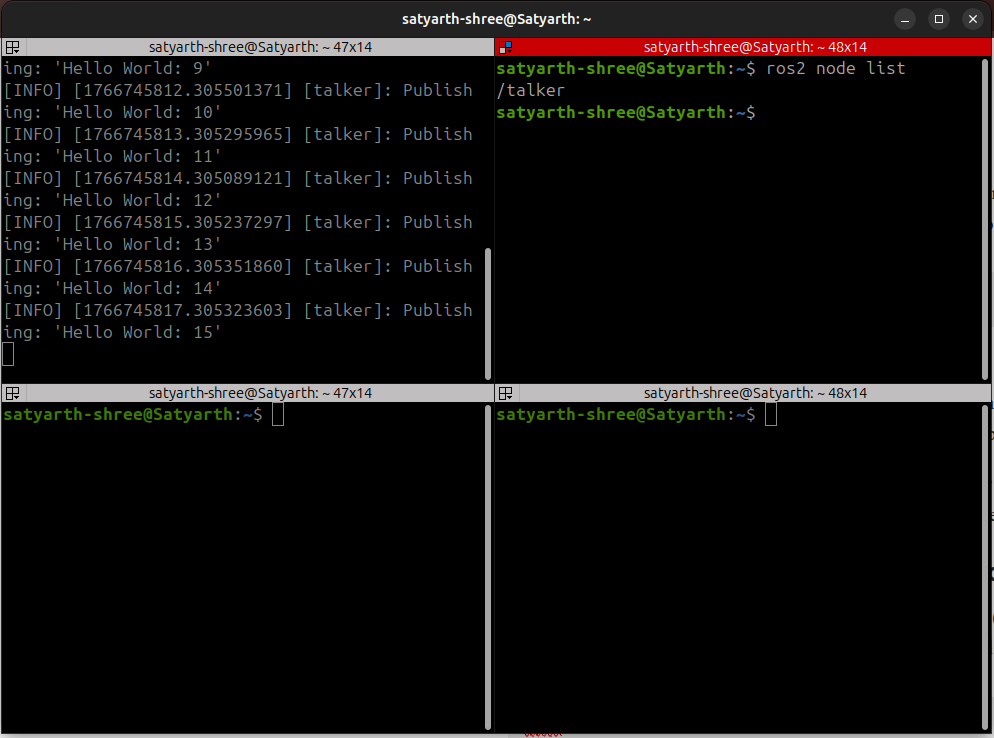
As you can see in one of the CLI window our node is running and in another CLI window when we typed "ros2 node list" then the name of the node that is running which is talker was displayed.
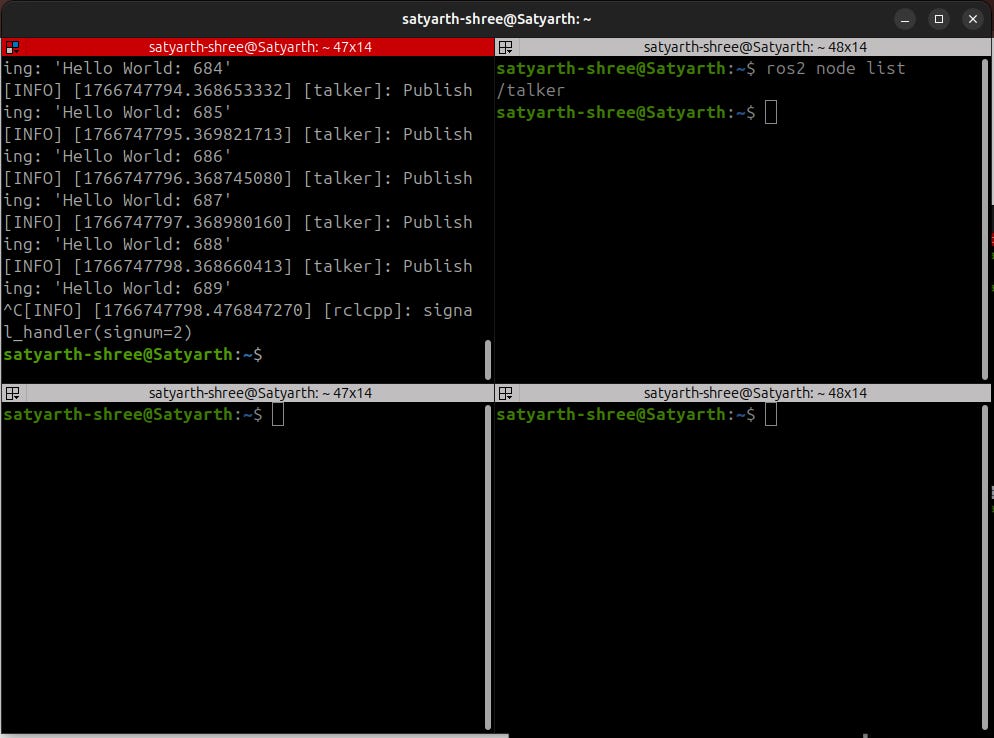
Now click on the CLI where your node is running to select it and press Ctrl + C. This key will stop your node as shown in the figure below:
Now again type ros2 node list in another terminal and you will see that no name is being displayed as shown in the figure below:
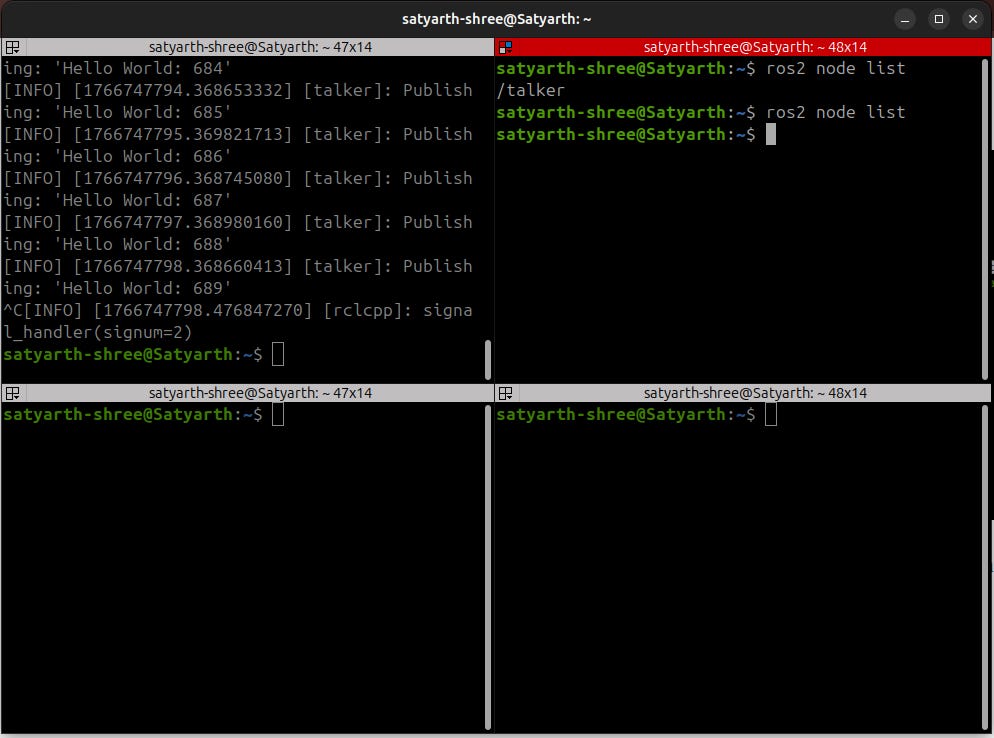
As you can see after you terminated your node by pressing "Ctrl + C" and then ran the command "ros2 node list" no node was displayed because now no node is running.
So we can conclude that the command: "ros2 node list" displays the names of those nodes which are currently running.
There is a another method to check which nodes are running.
Method 2: Using rqt_graph
Again run the node by typing the following command in one of the terminals:
ros2 run demo_nodes_cpp talker
Now in another terminal type the following command:
rqt_graph
And following screen will open before you:
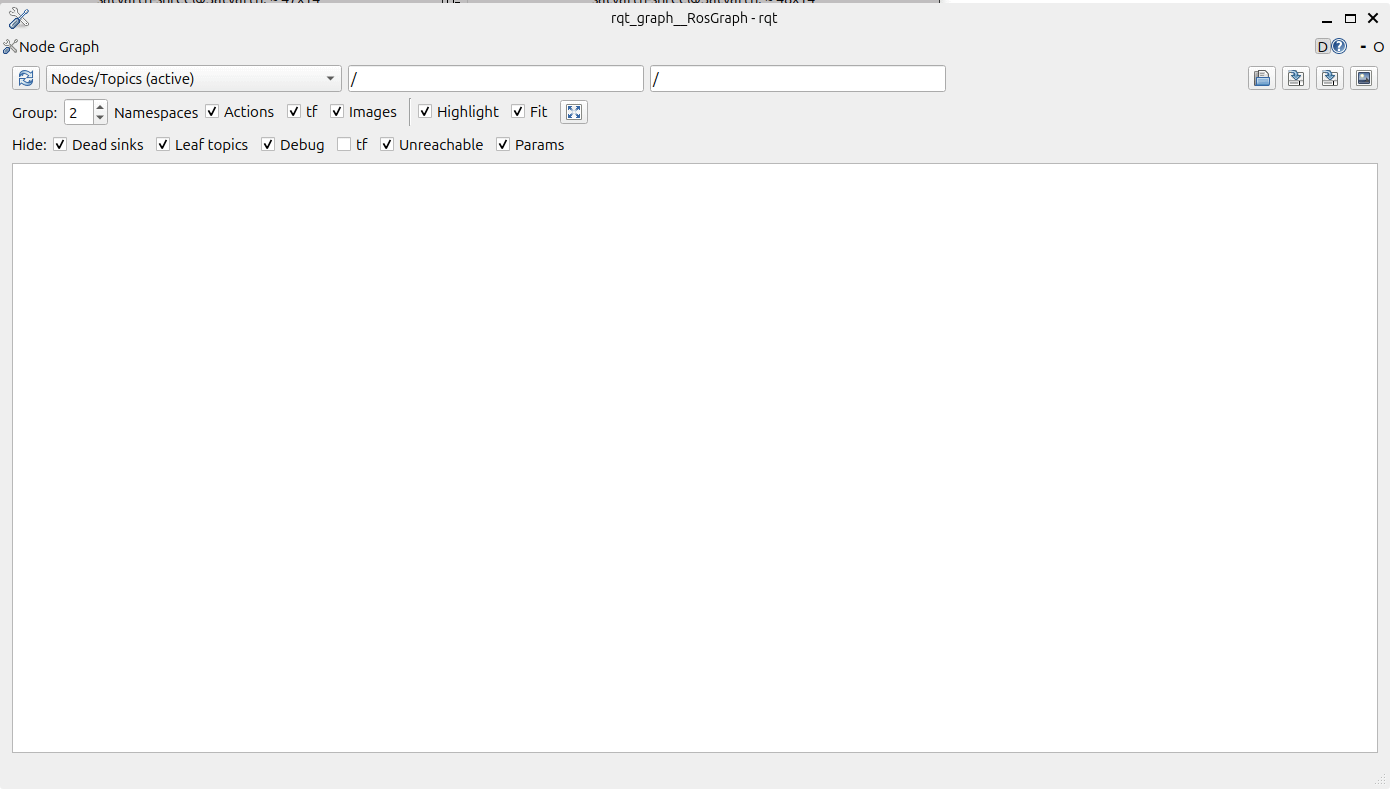
On top left corner you can see a refresh icon written just below Node Graph. The icon looks like this:

Click on this icon once to refresh rqt_graph and you will see the following node in the graph:
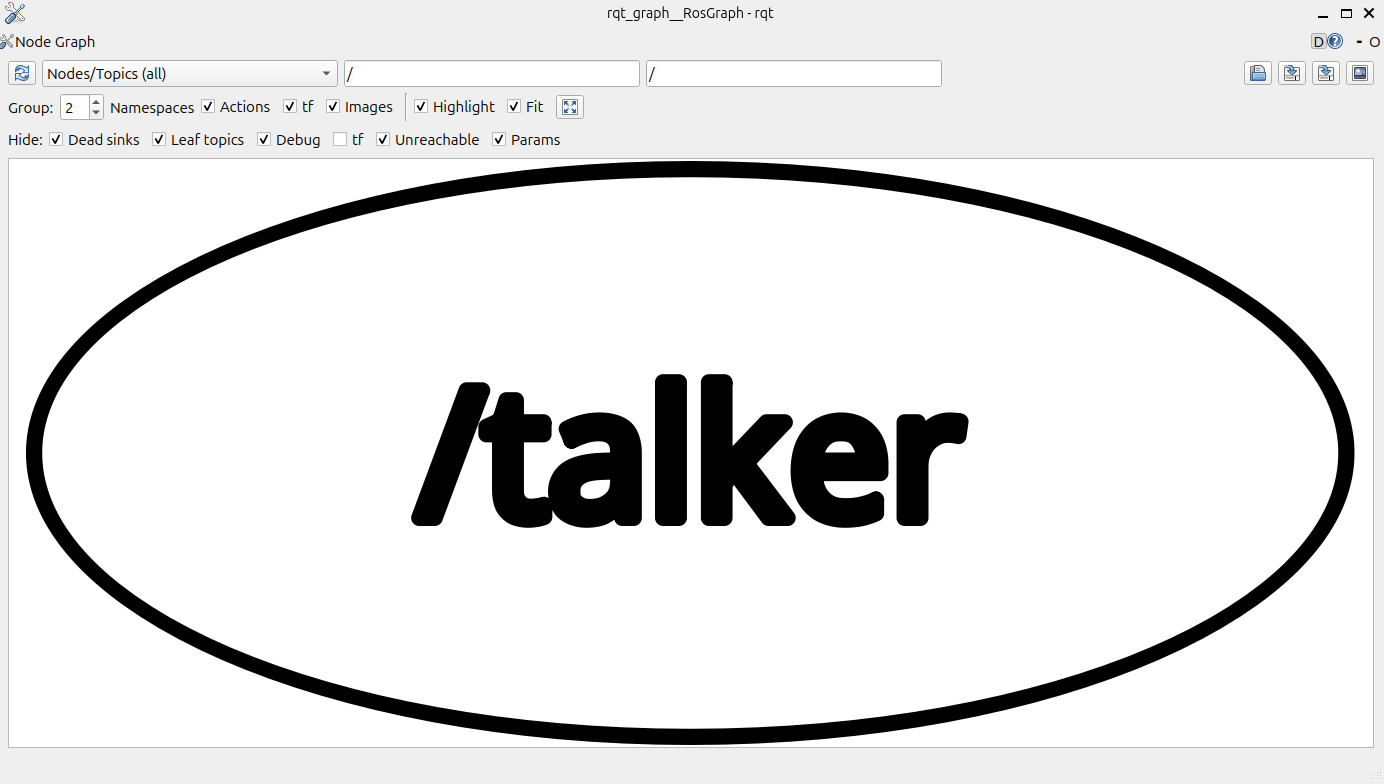
rqt_graph is basically a tool which you can use to see the name of the node which is currently running visually. As you can see the name "/talker" is displayed which is the same name that was displayed when we executed "ros2 node list" when we were discussing about the first method.
Now close this graph by clicking on the cross icon on the top right corner and terminate your node by clicking on the terminal where it is running and then pressing "Ctrl + C".
Now after terminating your node if you again run rqt_graph and refresh the graph then you will not see the name of any node because no node is running.
These are two methods using which you can check which node is running. These methods can also be used for Custom nodes.
Section 3: Experimenting With Nodes
You can achieve fluency in ROS only if you intentionally try to break things and then fix them. Most people especially beginners think of their terminal as a black box in which they run a command and then wait for it to magically run without any errors. What I want to say is that many beginners have a fear of terminals and commands because they don't understand the logic behind the system they are using.
If you truly want to broaden your understanding then read some of the experiments which I did and what insights and concepts that I learned side by side while doing them. You are more than welcome if you want to try these experiments yourself as I will be talking about them in great detail.
Experiment No.1: Running a node more than once
Open your terminator and split it into 4 parts. In two terminals run the talker node that we ran in previous sections of this blog by typing the following command:
ros2 run demo_nodes_cpp talker
Your terminal will look like this:
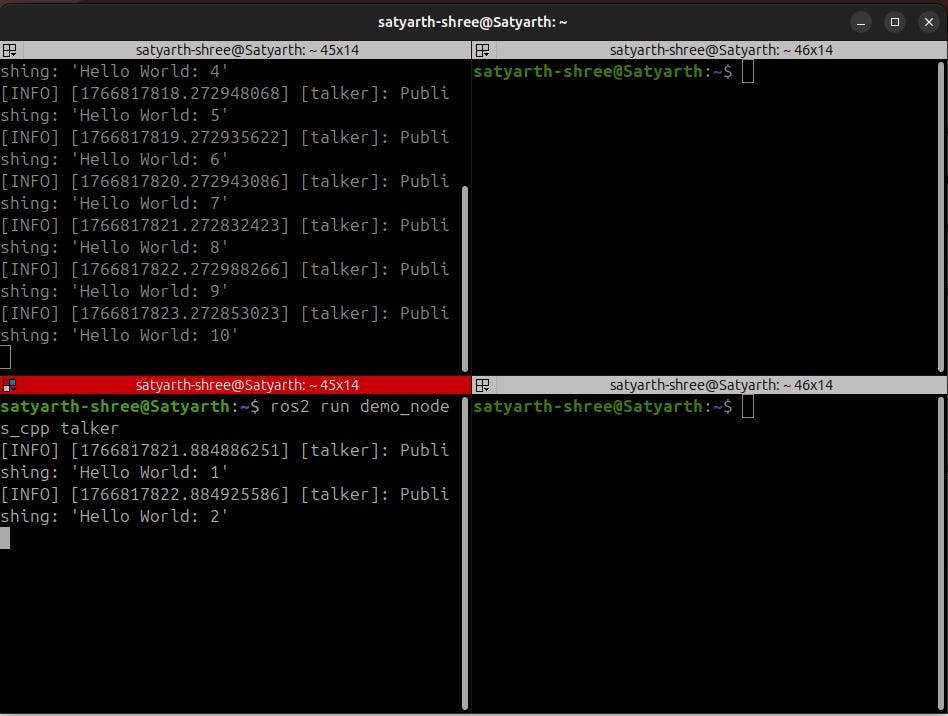
This talker node is running in two terminals. Now in the third terminal run the command:
ros2 node list
and you will see a warning message being displayed as shown:
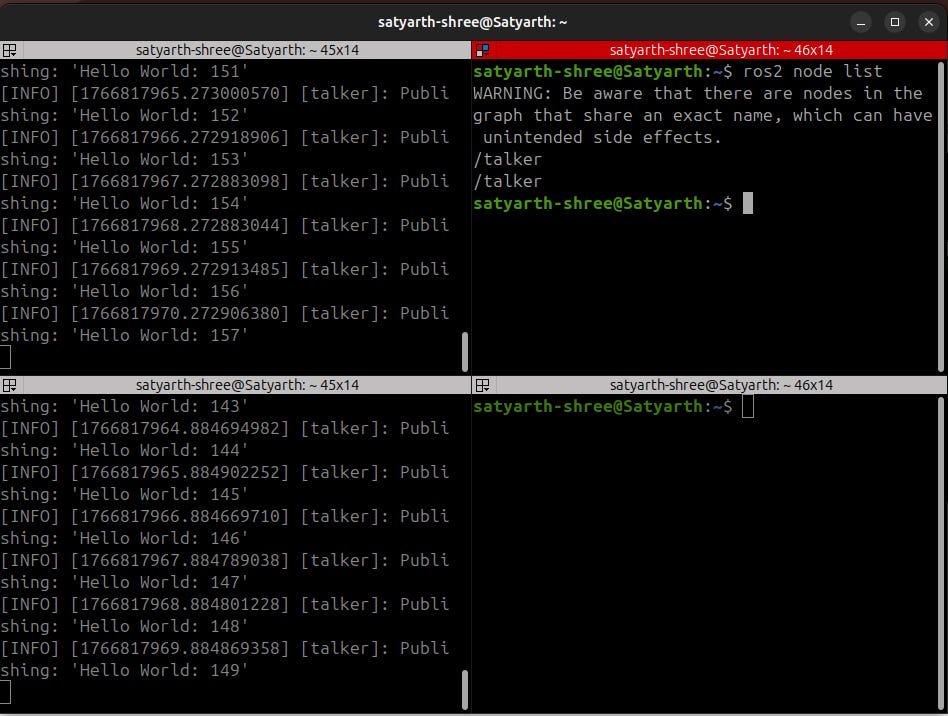
The warning states that:
WARNING: Be aware that there are nodes in the graph that share an exact name, which can have unintended side effects.
/talker
/talker
As you can see the warning clearly states that we are running two nodes with the same name because of which some unintended side effects might occur. Now run rqt_graph in the terminal and refresh it once. You will see the following graph:
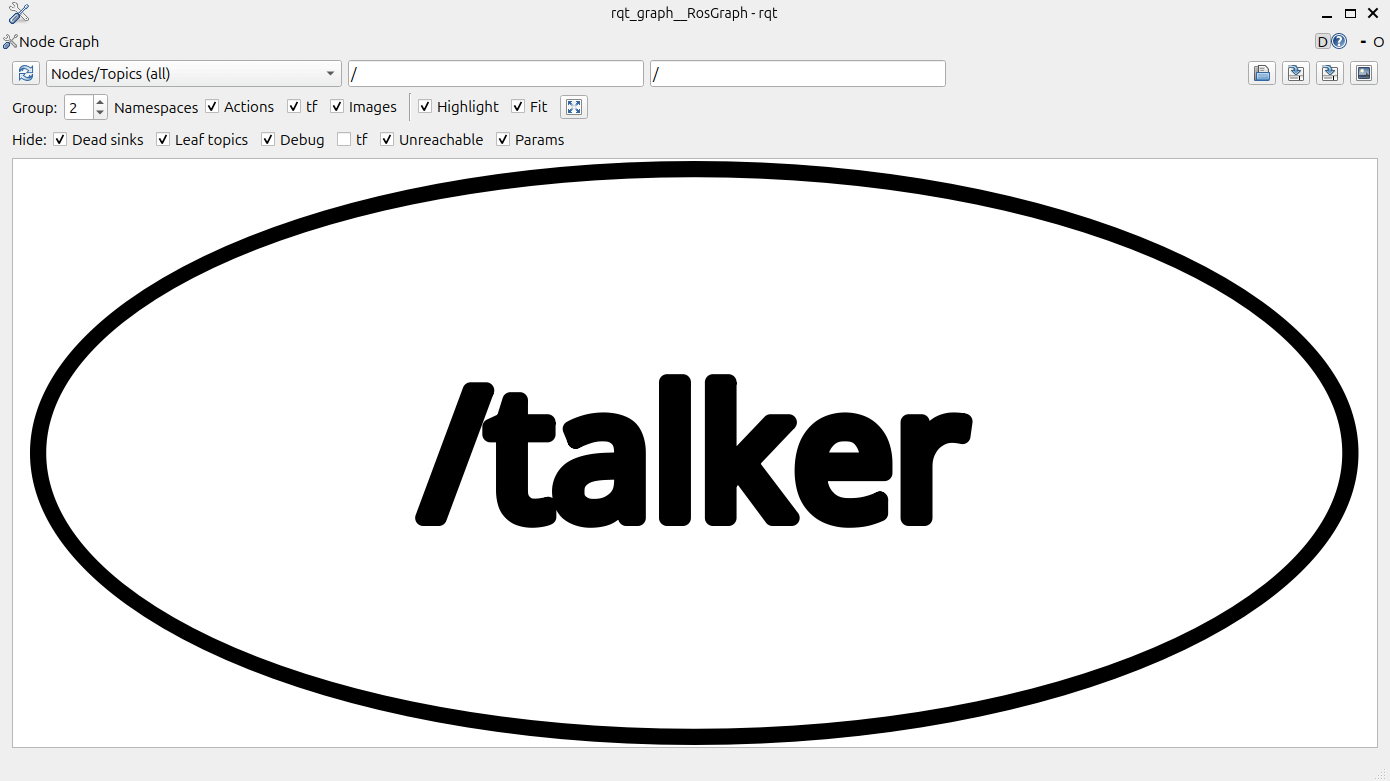
As you can see in rqt_graph only one node is being displayed.
So we can conclude that when we run one node two or more times simultaneously then ros2 node list displays a warning while rqt_graph displays that one node is running but there are two nodes running that have the same name.
There can be some situations in which we need to run one node multiple times simultaneously. But if we do so then the name conflict will occur as two nodes running will have the exact same name. So to resolve this issue ROS 2 provides a feature using which we can change the name of our node at run time.
Experiment No.2: Changing Name of a Node at Runtime
Now run talker node in one terminal and type the following command in other terminal:
ros2 run demo_nodes_cpp talker --ros-args -r __node:=my_node
The first part of this command which is: "ros2 run demo_nodes_cpp talker" is used to run the talker node and the second part which is: "—ros-args -r __node:=my_node" is used to change the name of our node.
The name that you will write after equal to sign will become the name of your node. Here we have written "my_node" after the equal to sign so the name of our node will change from "talker" to "my_node".
Now after executing this command run "ros2 node list" and you will see two different names as shown in the figure below:
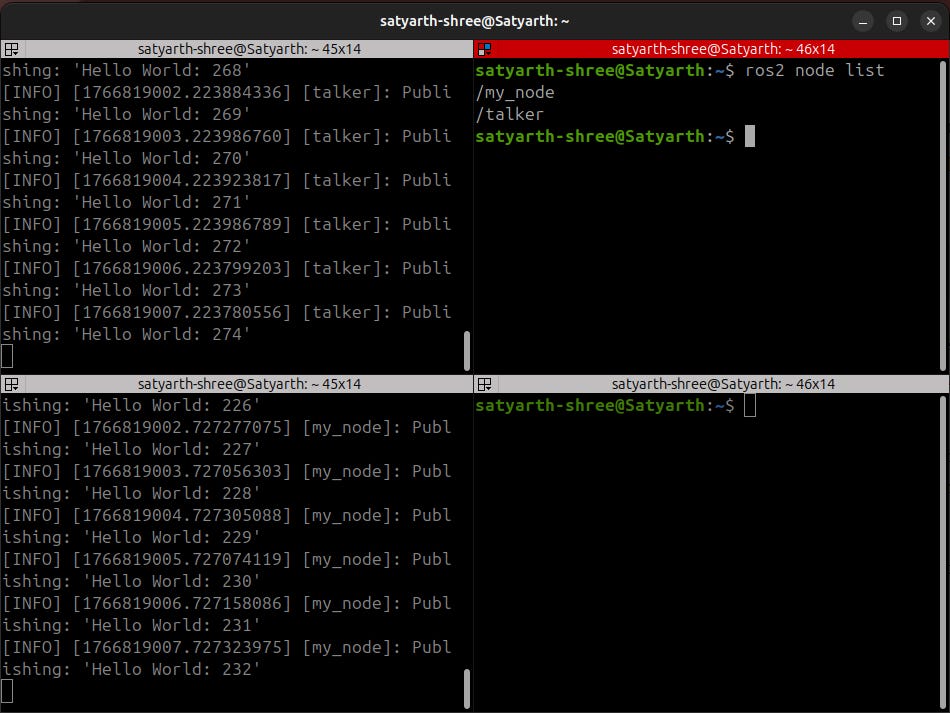
The two names which are being displayed after running ros2 node list are:
- talker
- my_node
This means that currently there are two nodes running one of them is named talker while the second one of them is named my_node. Technically we are running the same node in two different terminals we have just changed the name of one node while running it second time.
As you can see no warning is being displayed now because now the nodes that are running do not have the same name. Now run the rqt_graph and refresh it once. You will see the following result:
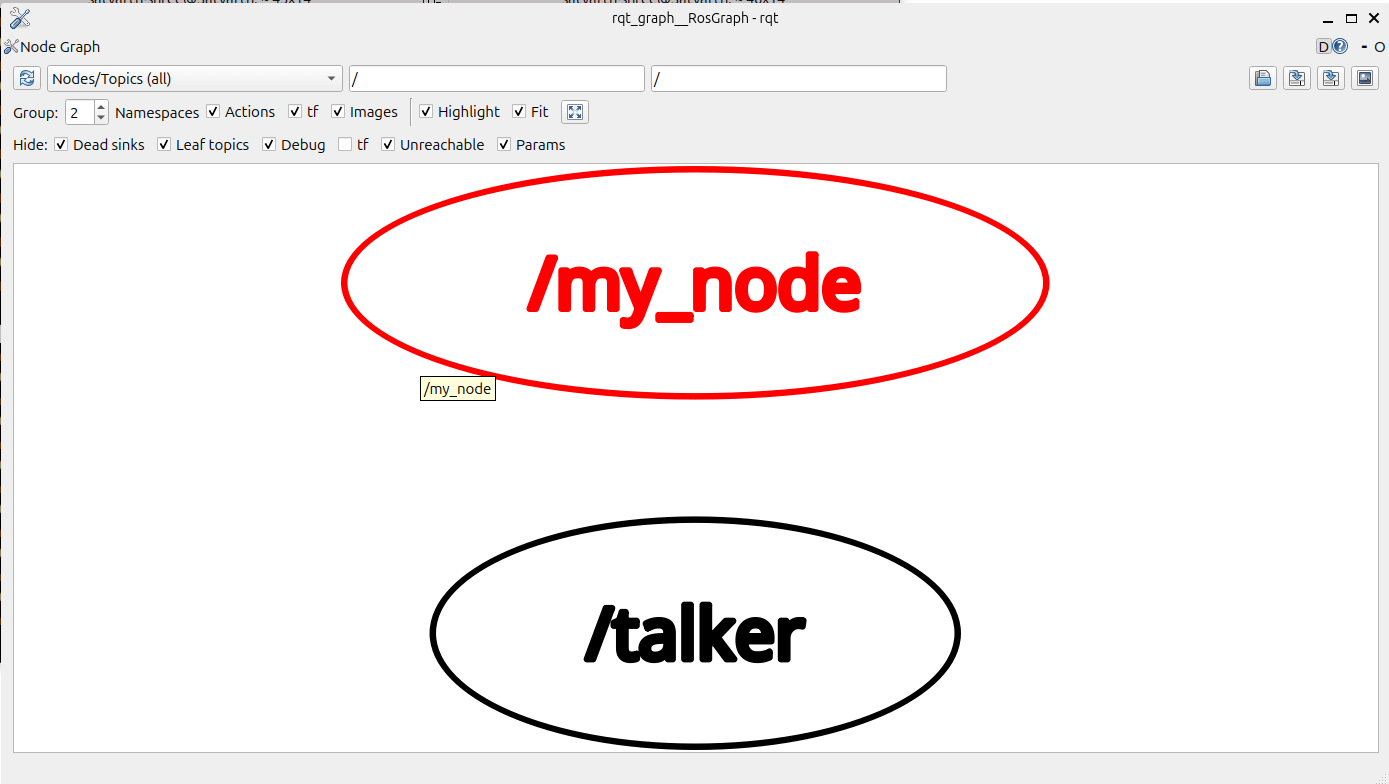
Now you can see two names are being displayed because the two nodes that are running have different names. Earlier when two nodes were running simultaneously then only one name was being displayed in rqt_graph because they had the same name but now since the names are different so the graph will also change accordingly.
Section 4: Insights about Nodes
If you carefully observe our discussion that we did in the previous three sections then there are 8 major things that you learned about a node. These are:
- Nodes can be broadly classified into two types. They are:
- Built-In Nodes
- Custom Nodes
- Multiple nodes can run simultaneously.
- If two nodes having the same name are running simultaneously and we used the command: "ros2 node list" then a warning message will be displayed.
- Before running any node or ROS 2 command we have to run the following command:
source /opt/ros/<distro>/setup.bash
Here <distro> should be replaced by your ROS 2 distribution name.
- Syntax of the command to run a node is:
ros2 run <package_name> <executable_name>
- Syntax of a command to change the name of a node during runtime is:
ros2 run <package_name> <executable_name> --ros-args -r __node:=<new_node_name>
Remove the < and > signs while typing the command. They are just being used to write syntax.
- There are two ways to check which nodes are currently active. They are:
- By using command: ros2 node list
- By using command: rqt_graph
- Name of the executable and name of a node may or may not be same. These are two different things.
You might be confused about the difference between an executable name and a node name. This confusion will be cleared once you create your own node and then create an executable out of that node to run it.
In Part 2 of this tutorial series we exactly did this. We created a node and then created an executable out of it. So if you want to clear your confusion you can read the second part of this series by clicking the button given below.
ROS 2 Tutorial for Beginners (Part 2)
Section 5: Running Another Built-In Node
There is another Built-In Node which you can run to understand how nodes work. Open your terminator and split into 4 parts. Run the following command in one part:
ros2 run turtlesim turtlesim_node
Then you will see a turtle appearing on your screen like this:
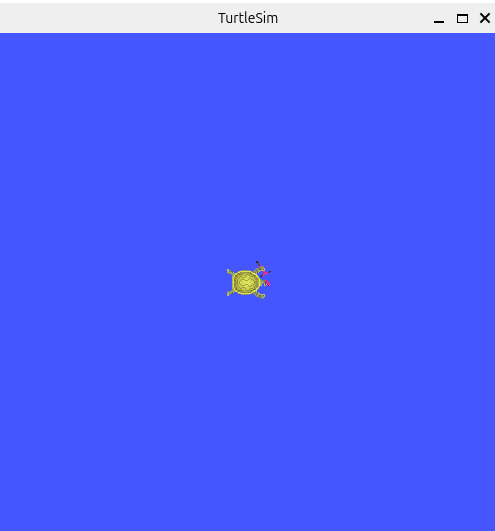
Now click on another CLI window and run the following command:
ros2 run turtlesim turtle_teleop_key
Click on the terminal where you have executed this command to select it. Now press your arrow keys and you will notice that turtle starts moving. If you press forward key the turtle moves forward, if you press backward key it moves in backward direction, if you press the right key it turns right and if you press the left key it turns left.
Now you can use command like rqt_graph and ros2 command list to check which nodes are running.
When you use rqt_graph then you will see a complex graph as shown in the figure below:
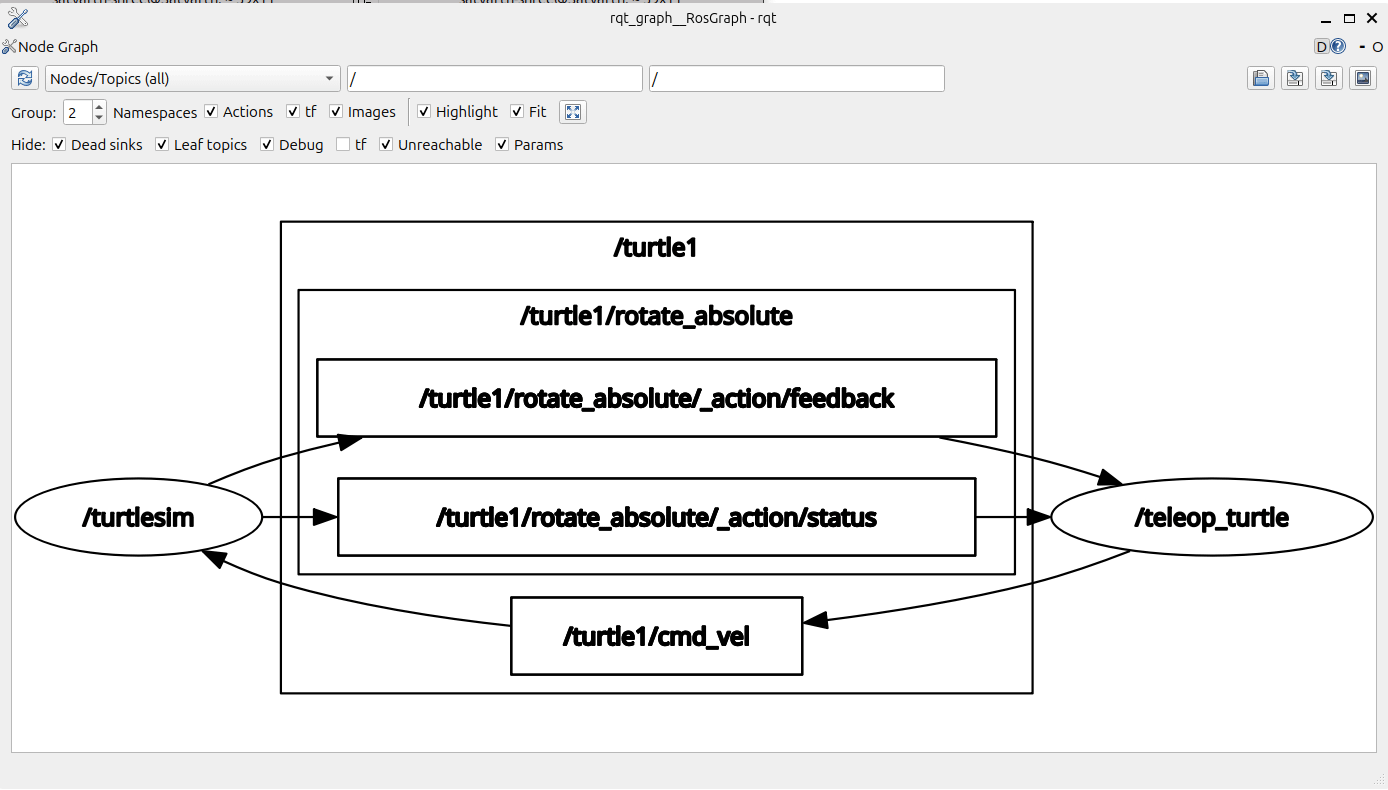
Why such a complicated graph was displayed?
If you observe carefully then you can clearly see that you are running two different nodes and they are not working independently. They are communicating with each other.
When you are running the node "turtle_teleop_key" then you can control the turtle which appeared when you ran the node "turtlesim_node". That means using the node "turtle_teleop_key" you are controlling the node "turtlesim_node".
The communication between these two nodes is happening because of Topics. You might be thinking what are Topics? You will learn about them later in this tutorial series.
This communication between nodes that is happening via topics is the reason why the rqt_graph has became so complicated. Over time as you progress in your journey of learning ROS 2 you will be able to understand these graphs better.
Call To Action
Hundreds of tutorials will fail to teach you a concept if you yourself do not try to practice it. To really learn the concepts that we have discussed in this blog you must do the following tasks:
- Run the talker node and introspect it using ros2 node list and rqt_graph
- Run the turtlesim node and introspect it using ros2 node list and rqt_graph
- Run these two nodes simultaneously and then again run rqt_graph
- Kill one of these nodes and then again refresh and check rqt_graph
- Experiment by running and then terminating these nodes to get a hang of it.
If you have any doubt then do let me know in the comments section. I will try to reply as soon as possible.
What's Next
In next part which will be ROS 2 Tutorial for Beginners (Part 3): Understanding ROS 2 Nodes (Sub Part 2) we will be discussing how to run custom nodes. The next part will allow you to gain even more deep insights on how a node works. I will inform you once the next part is published.
Till the stay tuned and keep learning!
Edit: Next part has been released! Click on this link to read it: https://rossimplified.substack.com/p/ros-2-tutorial-for-beginners-part?r=61m4w1
About The Publication: ROS Simplified
ROS Simplified is a learner-driven publication dedicated to making ROS (Robot Operating System) concepts clear, practical, and accessible. We provide tutorials, conceptual explainers, and project walkthroughs designed to help students, hobbyists, and engineers understand and apply ROS efficiently.
This is one of my initiatives to contribute helpful content to the ROS community. If you also have some experience with ROS and want to become a writer then visit the publication's page and go to Become a Contributor tab to apply and get added as a contributor of this publication.
If the content provided by our publication is helping you to learn more about ROS 2 and you want to keep receiving this content then do subscribe our publication so that you can directly receive our articles in your inbox.
— From Satyarth Shree, Founder and Editor-In-Chief of ROS Simplified
About The Author
Hi, I am Satyarth Shree a first semester BTech Robotics and Automation student at Lovely Professional University (LPU), India. I am an aspiring robotics engineer who is publicly documenting his learning journey using platforms like medium and wordpress. My areas of interests include ROS, python and mathematics. Currently I am focusing on ROS more. I have also started a publication named ROS Simplified to make ROS accessible to everyone by providing beginner friendly tutorials free of cost.
Let's Connect
- My Github: https://github.com/Satyarth-Shree
- My LinkedIn: https://www.linkedin.com/in/satyarth-shree-761357374/
- My CodeWars: https://www.codewars.com/users/Satyarth-Shree
- My X: https://x.com/BuildUnderdog
- My Hashnode: https://hashnode.com/@SatyarthShree
- My Portfolio: https://satyarth-shree.github.io/My-Portfolio/
- To professionally contact me for internships, collaborations or similar opportunities click here: https://forms.gle/SH9bj1oJwqPtJtD26
© 2026 Satyarth Shree