ROS 2 Tutorial for Beginners (Part 3): Understanding ROS 2 Nodes (Sub Part 2)
Sourcing, Running, and Inspecting Custom ROS 2 Nodes
Satyarth Shree — Feb 02, 2026
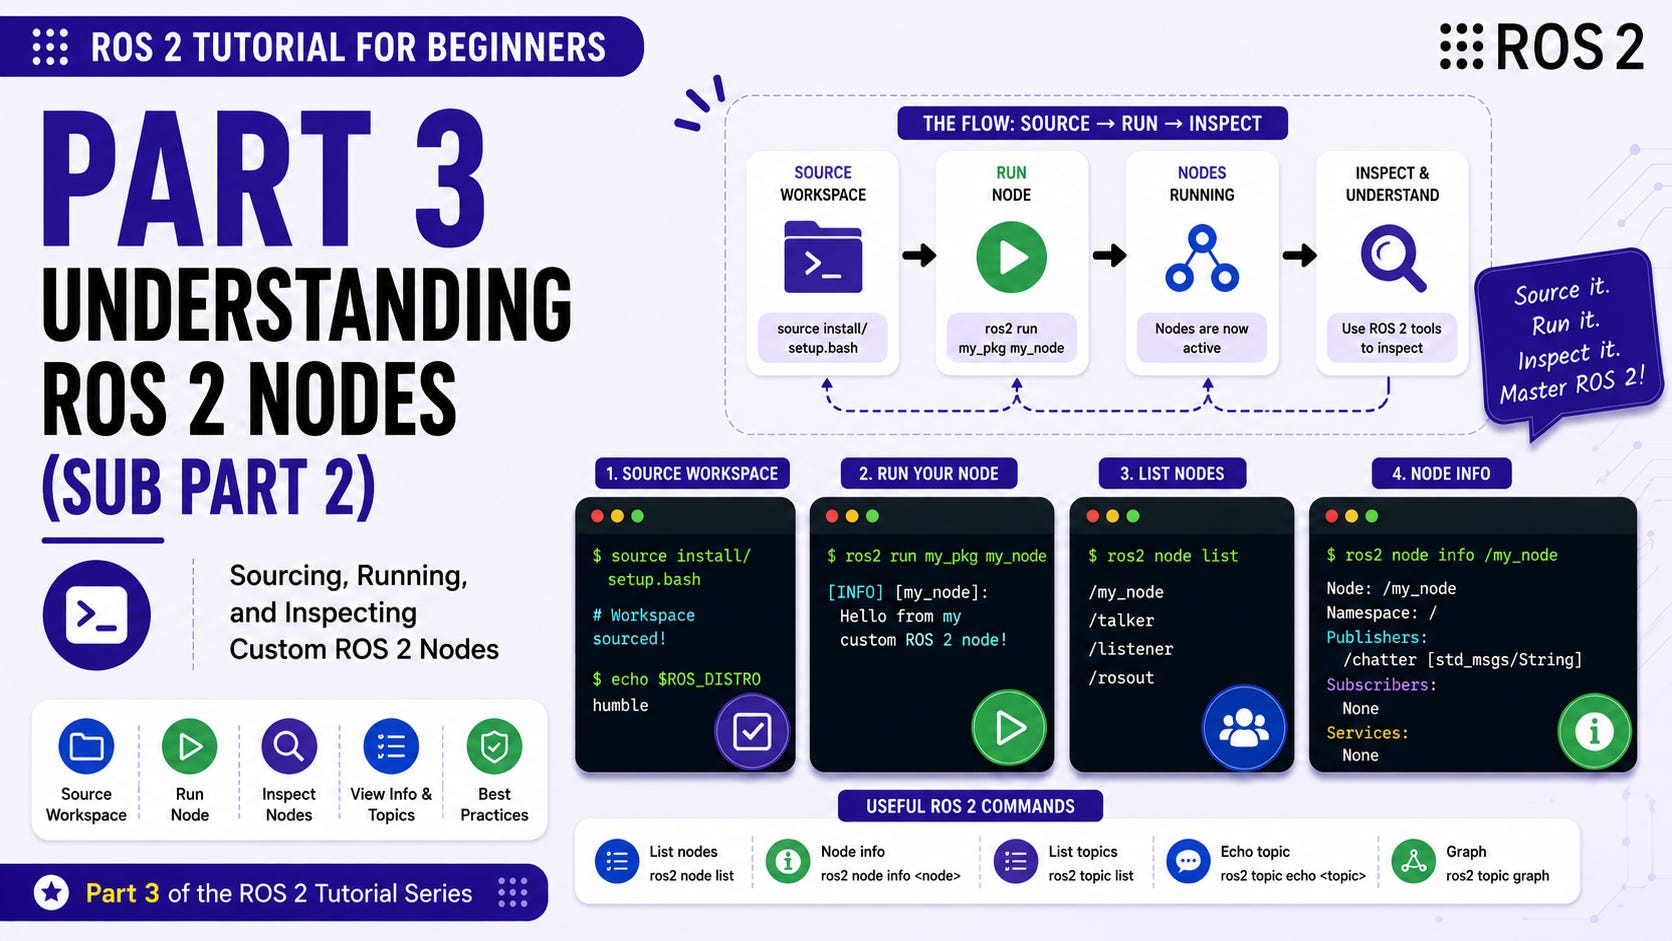
About This Article
This article is the sequel of ROS 2 Tutorial for Beginners (Part 3): Understanding ROS 2 Nodes (Sub Part 1). Therefore it is necessary to read the sub part 1 before continuing to read this tutorial. Click below to read it.
ROS 2 Tutorial for Beginners (Part 3): Understanding ROS 2 Nodes (Sub Part 1)
In the previous part of this ROS 2 Tutorial series we discussed how we can run built-in nodes and how can we introspect them using various tools provided by ROS.
In this part we will discuss how can we run our own custom made nodes. Most importantly what are the correct set of procedures that a ROS 2 learner needs to follow to run his own made nodes. This is exactly what we will be discussing in this tutorial.
In this tutorial I will use a basic node which I created in the part 2 of this tutorial series. If you are aware how to create a node that displays a message then you can proceed with this part but if you aren't then I recommend that you should first read part 2 before continuing with this one. Press the button given below to read it.
ROS 2 Tutorial for Beginners (Part 2)
If you wish you can continue reading this part without going through part 2 as every tutorial I write is meant to be a standalone article but to gain 100% understanding it is recommended that you go through it once.
We will be using a node that we created in part 2 of this tutorial series. To install that node in your system go to this github repository:
https://github.com/Satyarth-Shree/ros2-beginner-part-2-python-node
and then follow the instructions written in the README.md file to get this node installed in your system.
We will run this node later on in this blog so it is recommended to install it in your system so that you can also take advantage of a hands on practice session while reading this blog.
Alright let's continue
Section 1: Steps to Run a Custom Node
By custom node I mean to say a node that you have created yourself. Running a basic custom node requires you to execute four main steps. They are explained in the exact order in which they needs to be executed below.
Step 1: Creating a Node
The first step before trying to run a node is obviously creating it first. After creating a node you have to create an executable out of it. This is one of the most crucial step and the one where most people make a mistake.
In part 2 we have done exactly this.
Move to step 2 only after your node is correctly setup.
Step 2: Sourcing ROS 2 Environment
After your node has been successfully created and saved it is recommended to source your ROS 2 environment again. To do this type the following command:
source /opt/ros/<distro>/setup.bash
Replace <distro> by your ROS 2 distribution. If you are using ROS 2 humble distribution then write the following command to source your ROS 2 environment:
source /opt/ros/humble/setup.bash
If you are using ROS 2 Jazzy distribution then write the following command:
source /opt/ros/jazzy/setup.bash
Running this command ensures that ROS 2 functionalities can be used.
Step 3: Sourcing Your ROS 2 Workspace
Important Note: Clone the repository that I have shared previously before continuing further.
A node is always created inside a package and a package always exists inside a workspace. After running colcon build, our package and node executables are installed in the install folder. So we now have to run the following command:
source ~/<workspace_name>/install/setup.bash
Replace <workspace_name> by the name of your workspace inside which you have created your node.
This command updates our ROS 2 environment so that ROS 2 can locate and run our node. The name of my workspace is "ws" so I will write the following command:
source ~/ws/install/setup.bash
This is the same workspace inside which my node that I created in part 2 exists. I have already shared the link of my github repository and also the instructions on how to get this node working on your system (in the README.md file). Read those instructions carefully.
Let's assume you have created a folder named "ws_1" inside which you have cloned this repo. So now type the following command:
cd ~/ws_1/
This will ensure that you are currently in the folder inside which you have cloned the repository. Now run the following command:
colcon build
This will build your workspace. Now run the following command:
source ~/ws_1/install/setup.bash
Replace "ws_1" by the name of your workspace. Your workspace is the folder inside which you have cloned the github repository that I have shared with you.
Step 4: Running Your Node
To run a node you have to type a command having the following syntax:
ros2 run <package_name> <executable_name>
After run you have to first write the name of the package inside which your node exists and the name of the executable that will run your node. Remove greater than and less than signs while writing actual commands. They are only used to write syntax.
Now run the following command:
ros2 run py_pkg my_node
and you will see a output like this being displayed:
[INFO] [1768188057.615481153] [python_node]: I am learning ROS 2.
It is necessary to source your workspace before trying to run your node that you have created. Whenever you run "colcon build" after creating a node your executables are basically installed in the install folder of your workspace so it becomes necessary to source it.
Since you have cloned my github repository so the name of package and executable will be the same.
Section 2: Errors You are Possibly Getting
Maybe you are not getting this output and you are getting some error instead. This can happen because of two possibilities.
Error No.1: Running colcon build from the wrong folder
I asked you to run colcon build from the folder inside which you have cloned my github repository. If you ran colcon build while being inside src folder or some other folder apart, then your workspace hasn't been properly created yet. Make sure that the folder inside which you have cloned your repository has the following four folders in it:
1. build
2. install
3. log
4. src
The src folder is the one which you cloned from my github repository while the rest three folders are the ones which are automatically generated when you run colcon build.
If your folder doesn't has this folder structure then you have run colcon build from the wrong place/folder.
But there is nothing to worry. This mistake is recoverable. Just go to that wrong directory where you have ran colcon build using the "cd" command and type the following command:
rm -rf build install log
This command will delete build, install and log folders from that directory. Now go to your workspace using the "cd" command and make sure you are at the correct folder before running "colcon build". Right now inside that folder you will only see one folder which is src because you have used "colcon build" in some other folder so build, install and log folders haven't been generated yet in your main workspace.
Now when you are in your workspace folder inside which your src folder is present run the command:
colcon build
To successfully generate your workspace. Let's assume that you have cloned my github repository in a folder named "ws_1" so execute the commands given below one by one in the exact same chronological order:
1. cd ~/ws_1/
2. colcon build
3. source install/setup.bash
Now type the following command to run your node:
ros2 run py_pkg my_node
It will most probably run now. If you are still encountering some errors then make sure you have followed all the steps currently in this section and then proceed to the next one where we are discussing about some another error.
Error No.2: Not Sourcing Your Workspace
It is possible that your workspace is correctly configured but you are still not able to get your node running. If after typing the following command:
ros2 run py_pkg my_node
you are getting the following error:
Package 'py_pkg' not found
Then it is certain that you are doing this mistake.
You are getting this error because ROS 2 cannot identify or locate your package. This happens when you haven't sourced your workspace correctly.
Let's assume that the name of your workspace is "ws_1". So run the following command first:
source ~/ws_1/install/setup.bash
Replace ws_1 by the name of your workspace. After running this command now again run the the following command:
ros2 run py_pkg my_node
Doing this will completely fix the "package not found" error. I also did exactly this as shown in the figure below:
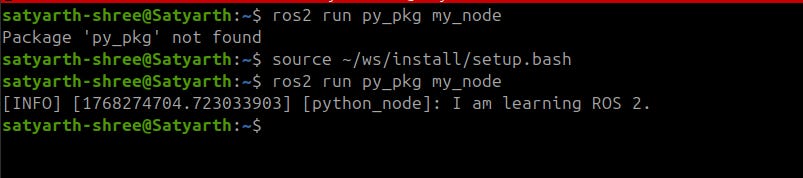
As you can see in the figure shared above, I was getting the "package not found" error by then I sourced my workspace and the error was resolved. The name of my workspace is "ws", so I replaced "ws_1" by "ws". You have to also do the same. Replace "ws_1" by the name of your workspace.
This was a short tutorial which is basically aimed at explaining how you can run your own made nodes. In previous part I discussed on how you can run multiple nodes together and how you can introspect them. These concepts are very important for developing an understanding of nodes so make sure to read them too.
What's Next
We have covered the following concepts so far in our tutorial series:
- Creating a Workspace
- Creating a Package
- Creating your own custom node that displays a message
- Running Built In Nodes
- Running Custom Nodes
Edit: The next part which is Part 4 of our ROS 2 Tutorial series has been released. Click here to read it:
ROS 2 Tutorial for Beginners (Part 4)
About The Publication: ROS Simplified
ROS Simplified is a learner-driven publication dedicated to making ROS (Robot Operating System) concepts clear, practical, and accessible. We provide tutorials, conceptual explainers, and project walkthroughs designed to help students, hobbyists, and engineers understand and apply ROS efficiently.
This is one of my initiatives to contribute helpful content to the ROS community. If you also have some experience with ROS and want to become a writer then visit the publication's page and go to Become a Contributor tab to apply and get added as a contributor of this publication.
If the content provided by our publication is helping you to learn more about ROS 2 and you want to keep receiving this content then do subscribe our publication so that you can directly receive our articles in your inbox.
— From Satyarth Shree, Founder and Editor-In-Chief of ROS Simplified
About The Author
Hi, I am Satyarth Shree a first semester BTech Robotics and Automation student at Lovely Professional University (LPU), India. I am an aspiring robotics engineer who is publicly documenting his learning journey using platforms like medium and substack. My areas of interests include ROS, python and mathematics. Currently I am focusing on ROS more. I have also started a publication named ROS Simplified to make ROS accessible to everyone by providing beginner friendly tutorials free of cost.
Let's Connect
- My Github: https://github.com/Satyarth-Shree
- My LinkedIn: https://www.linkedin.com/in/satyarth-shree-761357374/
- My CodeWars: https://www.codewars.com/users/Satyarth-Shree
- My X: https://x.com/BuildUnderdog
- My Hashnode: https://hashnode.com/@SatyarthShree
- My Portfolio: https://satyarth-shree.github.io/My-Portfolio/
- To professionally contact me for internships, collaborations or similar opportunities click here: https://forms.gle/SH9bj1oJwqPtJtD26
© 2026 Satyarth Shree